This tutorial will show you how to install and set up React Native (with the React Native CLI) for Android development, on macOS.
Note: If you already set up your Mac to run React Native on the iOS simulator (via Xcode), as shown in this tutorial then you already installed Node.js & Watchman and can skip that step and go right to the install Java Development Kit step.
Install React Native dependencies for Android
To build React Native apps for Android on a Mac, you’ll need to install a few tools and dependencies:
- Node.js
- Watchman
- Java Development Kit (JDK)
- Android Studio
Install Node.js and Watchman
The recommended way to install Node and Watchman is by using Homebrew. Once you have Homebrew installed, run these commands in your terminal while inside your project root folder:
brew install node
brew install watchman
Note: if you already have Node installed, make sure it’s version 8.3 or newer. I’m currently on Node v12.16.1.
Installing could take a few minutes, depending on your Internet connection.
Install Java Development Kit
The recommended way to install JDK is by also using Homebrew. Run these commands in your terminal:
brew tap AdoptOpenJDK/openjdk
brew cask install adoptopenjdk8
Install Android Studio
Android’s development environment is different from Apple’s. On iOS, you only have one option as far as emulators/simulators go (via Xcode). On Android, you can choose between different 3rd party emulators, both paid and free.
We’re going to set up Android with Android Studio, which is the official IDE.
Download Android Studio from the official website.
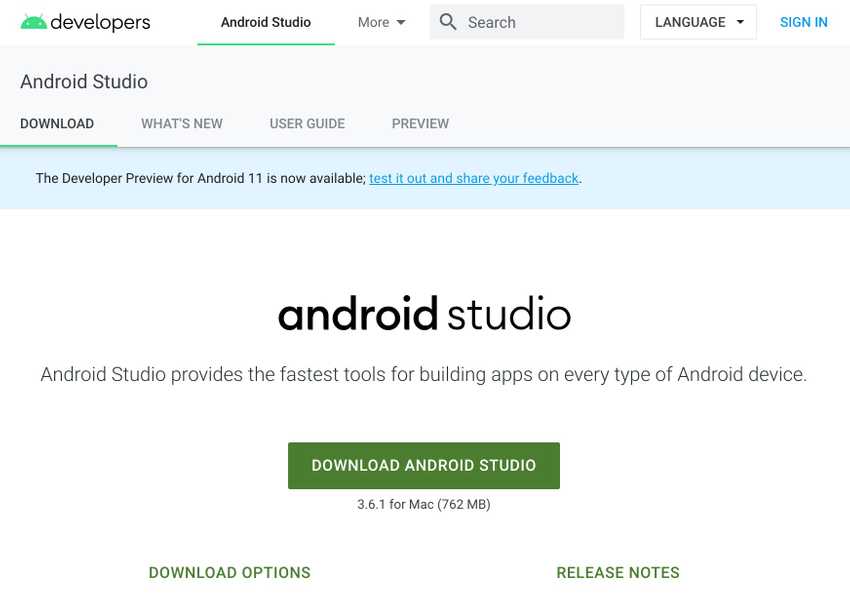
After Android Studio is downloaded, drag it to your /Applications folder:

Open it and follow the instructions.
If you have some existing Android Studio configurations you can now import them. Most likely you don’t, so choose Do not import settings and click OK
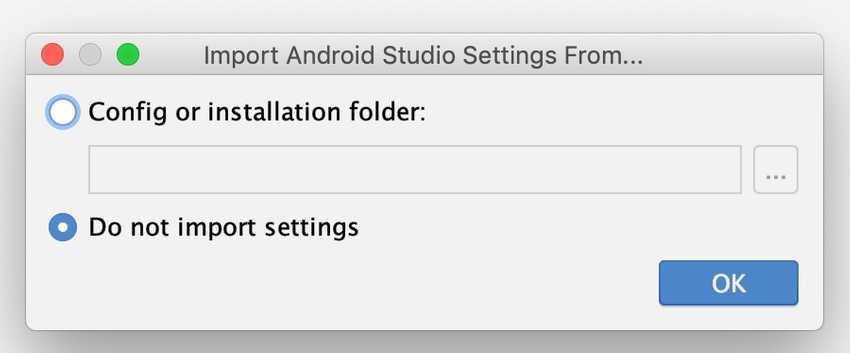
Which will take you to the Android Studio set up wizard:
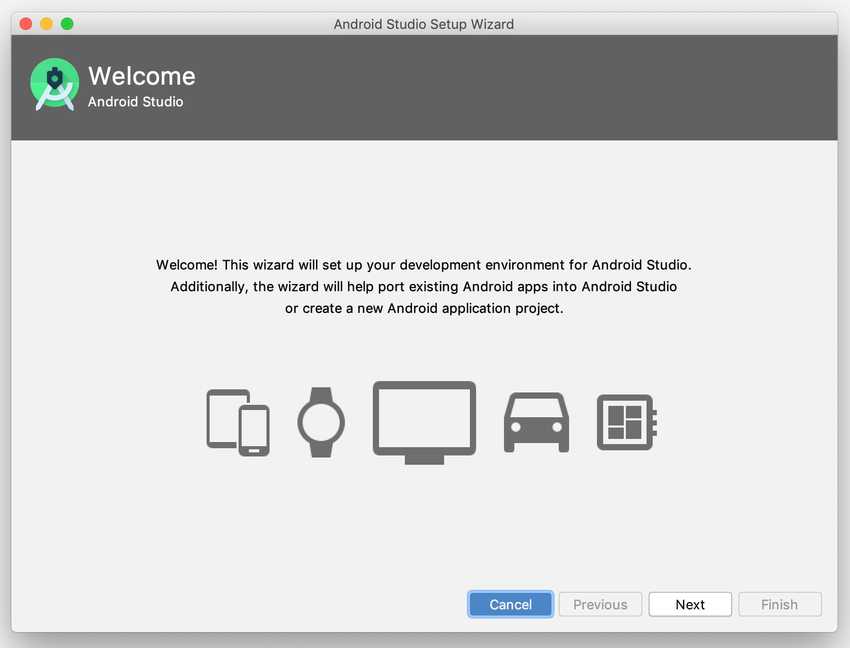
Click Next to get to the Select JDK Default Location window.
I use the default:
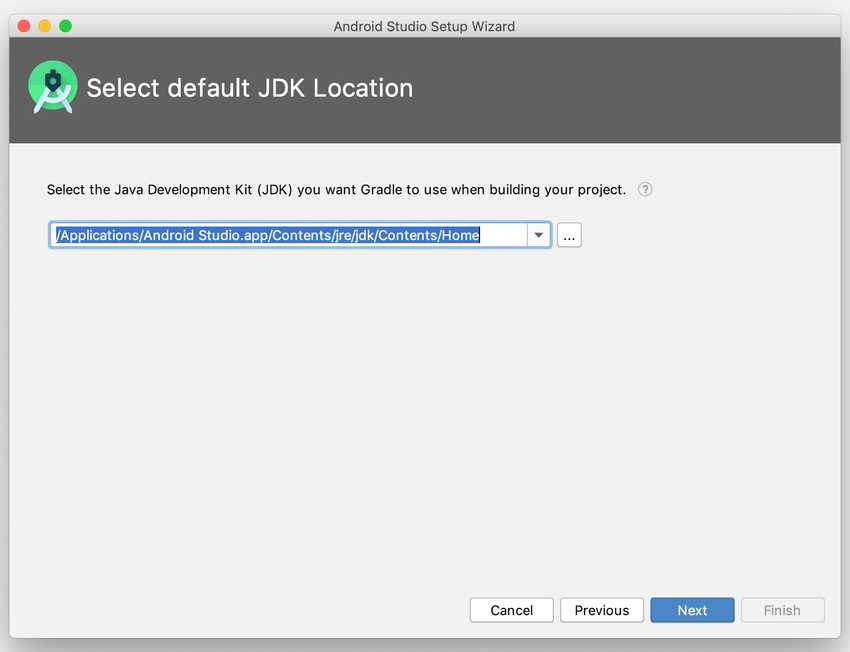
Click Next.
Now it will ask you to pick a theme, light or dark. Choose whatever you prefer, you can always change it later.
Click next to get to the Install Type window.
The default Install Type is Standard.
Choose Custom:
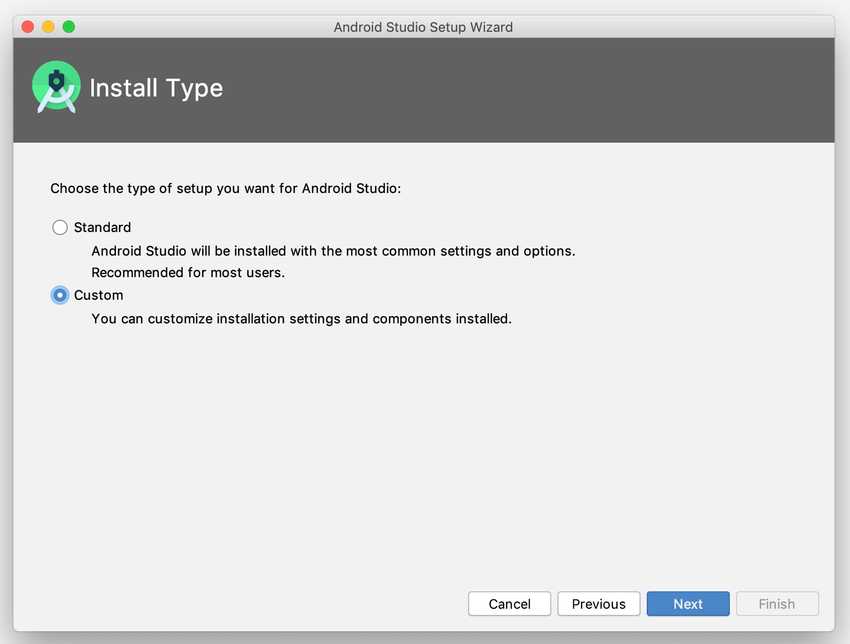
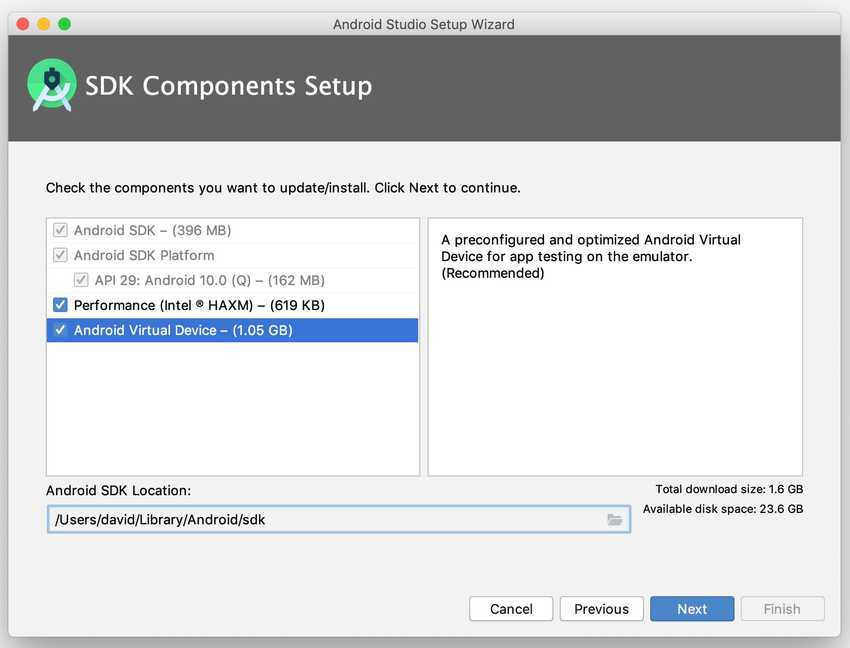
Click Next to get to the SDK Components Setup screen:
Make sure to check all these boxes:
- Android SDK
- Android SDK Platform
- Performance (Intel ® HAXM) (See here for AMD)
- Android Virtual Device
As you see in this screenshot:
Click Next to get to the Emulator Settings:
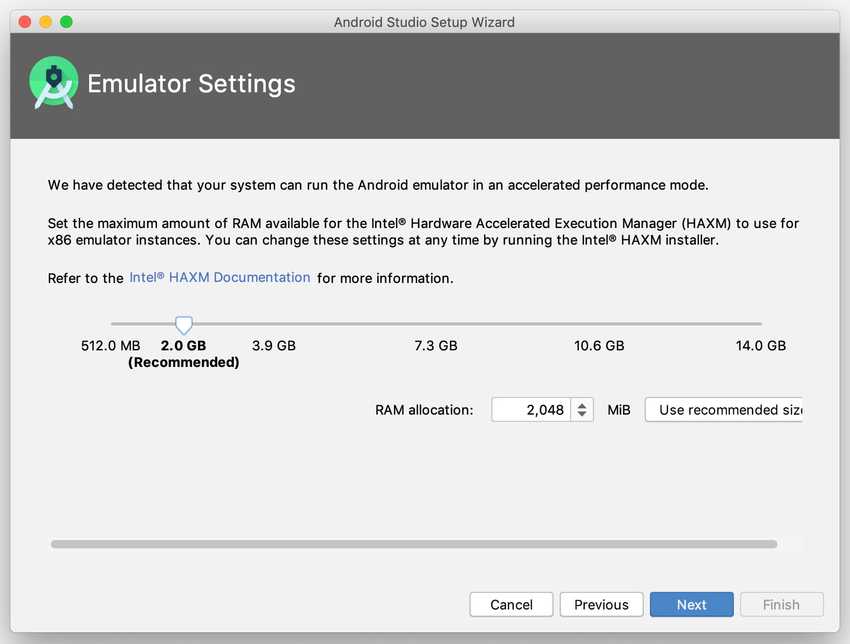
Your configuration may look different than mine depending on your computer specs. You will be asked how much of your RAM resources you want to delegate to the Android emulator. The more you give it the faster it will process, but if you give it too much your computer may start lagging.
I choose the default recommended settings. You can always change the settings later.
Click Next, and you’ll be asked to verify your settings.
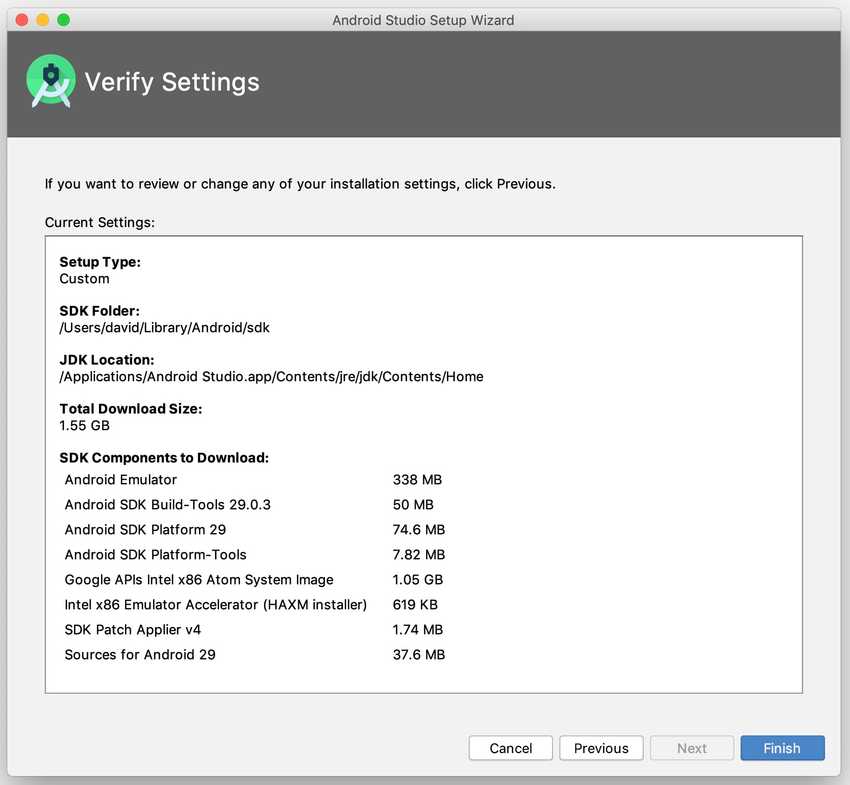
Click Finish, and now Android Studio will begin downloading the Android SDK (unless you already have it). This can take a while, it’s around 800MB.
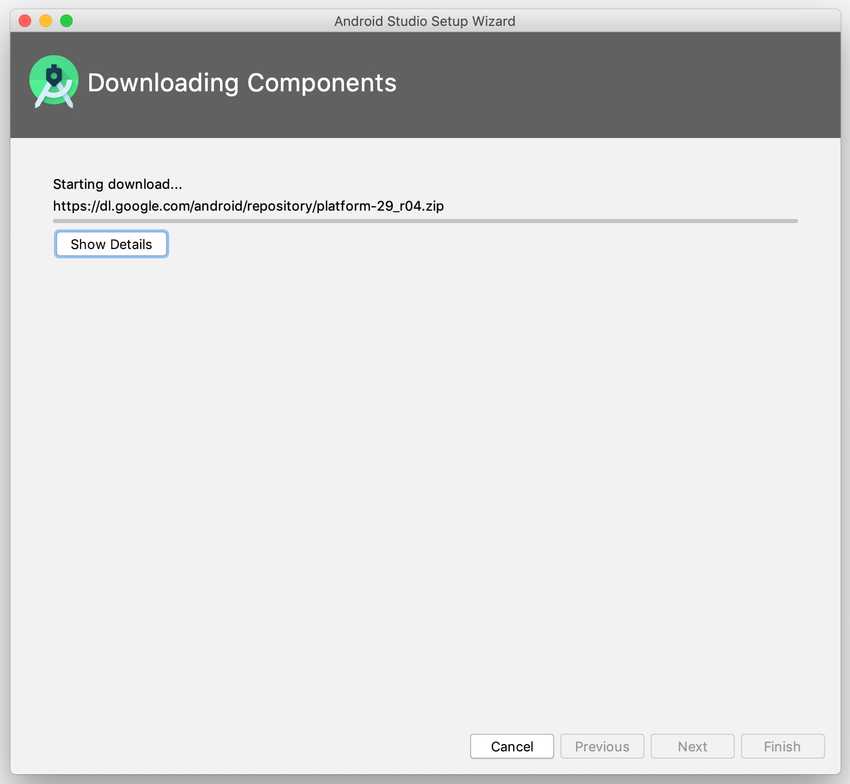
Once it’s done, click Finish and you’ll be greeted with this screen:
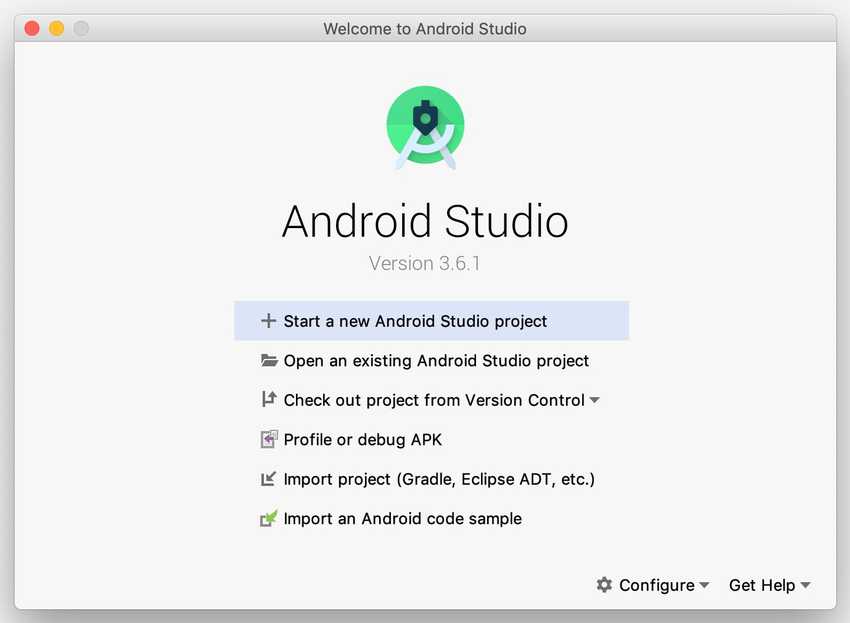
Now Android Studio is installed, but we still need to do a couple of things.
Configure Android Studio for React Native
Click on Configure > SDK Manager
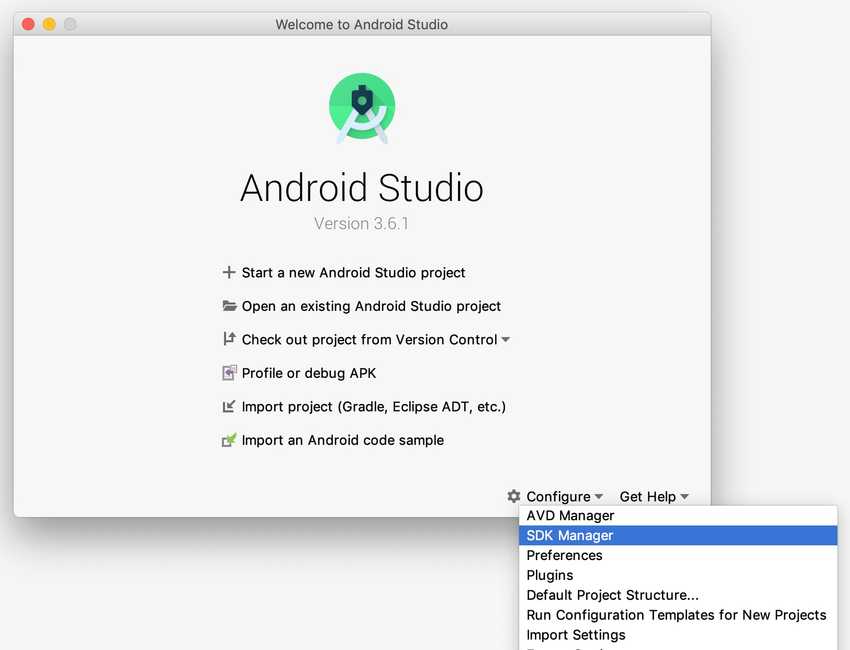
Which will open the SDK Manager panel:
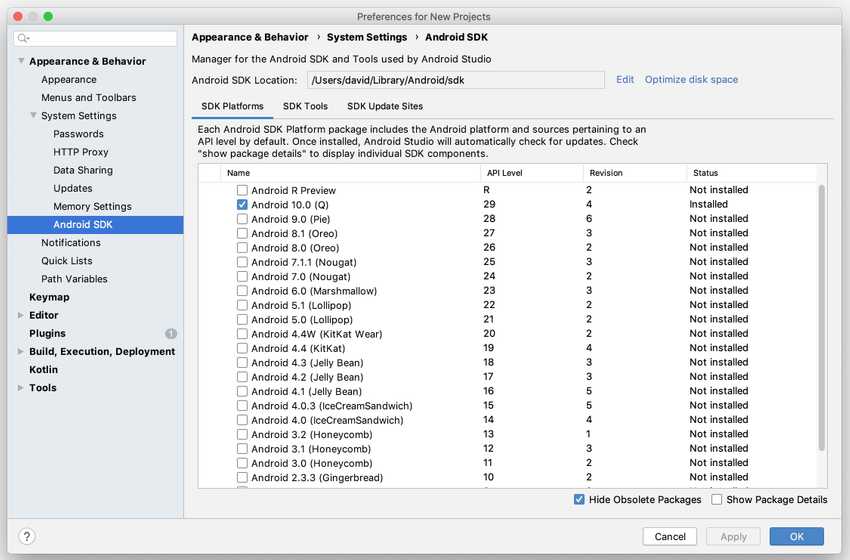
Take note of the Android SDK Location path at the top of this screen. You’ll need this path value to define environment variables shortly.
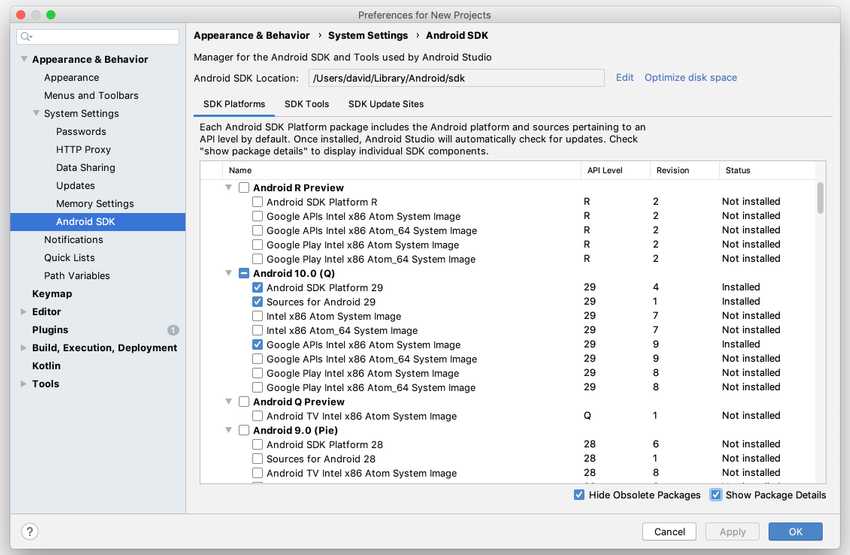
Now under the SDK Platforms tab at the bottom right, check the box next to Show Package Details which will reveal additional info about each option.
Expand the Android 10.0 (Q) entry (if it’s not already), and make sure the following items are checked:
- Android SDK Platform 29
- Intel x86 Atom_64 System Image or Google APIs Intel x86 Atom System Image
Here how my setup looks:
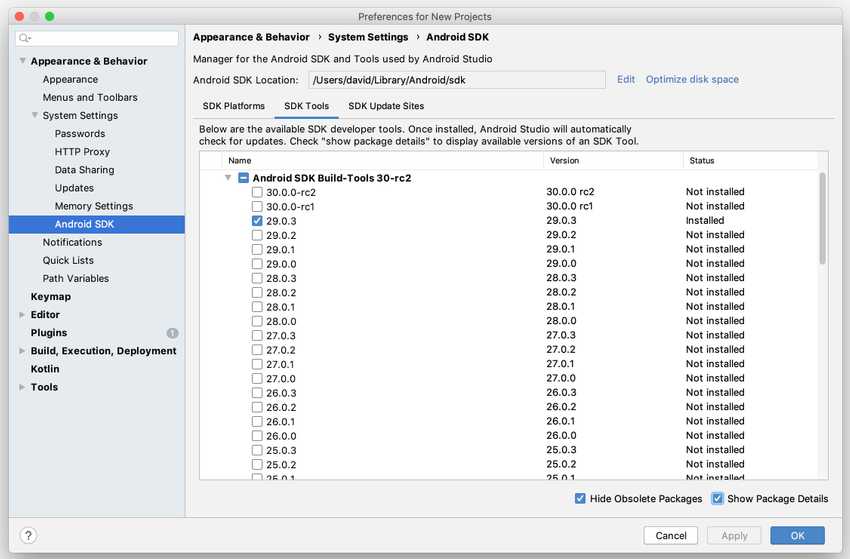
Now go to the “SDK Tools” tab and check the box next to “Show Package Details” here as well. Expand the "Android SDK Build-Tools" entry if it’s not already open, and make sure 29.0.3 is selected.
Now, while still under the SDK Tools tab scroll down until you find the Google Play Licensing Library and check the box next to it.
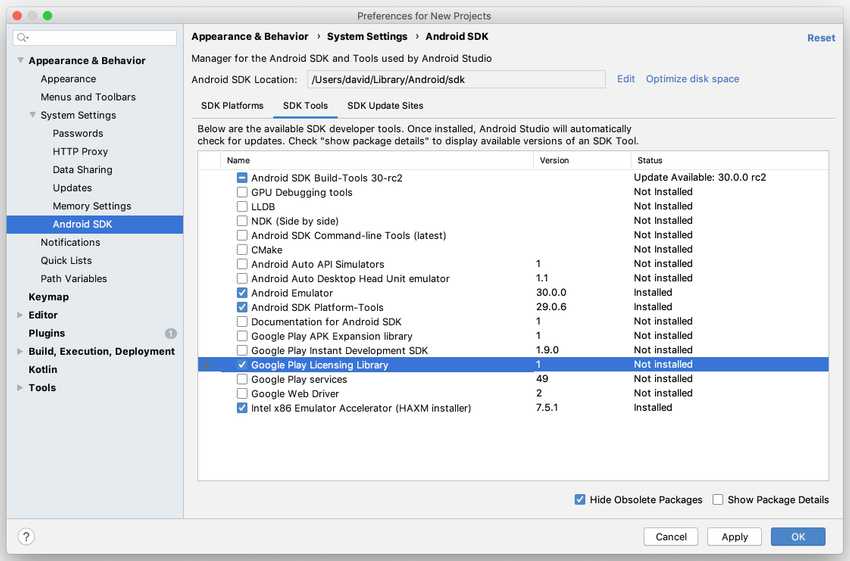
If you forget checking this box, you will run into a missing licensing error later on when you try to launch your app, such as this:
> Failed to install the following Android SDK packages as some licenses have not been accepted.Now click Apply and you’ll be asked to confirm (a couple of times) that you want to install the Google licensing library. Click Ok/Next, wait for it to finish downloading, and then click Finish.
Now you’re done installing Android Studio and the SDK components & build tools and it’s time to fire up your Terminal and run a few commands to get React Native to work with Android Studio.
Configure ANDROID_HOME environment variable
Open your Terminal and navigate to your computer’s root directory (usually it’s the default directory).
Now you need to open your .bashrc or .bash_profile file if you have any. If you don’t have either, create one by running this command:
touch .bashrcNow you can open this .bashrc file in your preferred editor. To open it directly in your Terminal via nano, run this command:
nano ~/.bashrcNow you need to add your environment variables to this file. This part can be a little tricky to get right, but I'll try my best to explain.
The official React Native docs tell you to add these variables to your bash file:
export ANDROID_HOME=$HOME/Library/Android/sdk
export PATH=$PATH:$ANDROID_HOME/emulator
export PATH=$PATH:$ANDROID_HOME/tools
export PATH=$PATH:$ANDROID_HOME/tools/bin
export PATH=$PATH:$ANDROID_HOME/platform-tools
But they don’t mention that you need to edit the first line so it matches your exact location path to your Android SDK folder.
This line:
export ANDROID_HOME=$HOME/Library/Android/sdkRemember I told you this earlier when setting up Android Studio:
Take note of the Android SDK Location path at the top of this screen. You’ll need this path value to define environment variables shortly.
If you didn't, you can just go to Android Preferences > Appearance & Behavior > System Settings > Android SDK and here you’ll see the location you need to add to the ANDROID_HOME variable. In my case it’s this:
/Users/david/Library/Android/sdkSo I changed this line:
export ANDROID_HOME=$HOME/Library/Android/sdkTo this:
export ANDROID_HOME=/Users/david/Library/Android/sdkSo now my .bashrc file looks like this:
export ANDROID_HOME=/Users/david/Library/Android/sdk
export PATH=$PATH:$ANDROID_HOME/emulator
export PATH=$PATH:$ANDROID_HOME/tools
export PATH=$PATH:$ANDROID_HOME/tools/bin
export PATH=$PATH:$ANDROID_HOME/platform-tools
You only need to change the first line (because the other lines get the path referenced via the $ANDROID_HOME variable) to match the Android SDK location from your Android Studio. Then copy-paste it all into your .bashrc file and save it by pressing CTRL + X, Y, Enter, to save changes.
Now restart your terminal to make the changes take effect.
Enter this command to load your configurations into your current shell:
source $HOME/.bashrcAnd verify that ANDROID_HOME has been added to your path by running this command:
echo $PATH.Your output should look similar to this:
Users/david/Library/Android/sdk/emulator:/Users/david/Library/Android/sdk/tools:/Users/david/Library/Android/sdk/tools/bin:/Users/david/Library/Android/sdk/platform-toolsIf it does, you should be set up and ready to run React Native apps via the Android Studio Emulator!
Create your first React Native project
Note: if you already created a React Native project by following the iOS tutorial you can just click here to skip this section and go straight to running your React Native app with Android.
...
To create your first React Native project, we’ll use the React Native CLI which ships with React Native by default.
Note: the official React Native guide warns:
If you previously installed a global react-native-cli package, please remove it as it may cause unexpected issues.
If you need help to remove React Native CLI, check out this StackOverflow thread.
To create your React Native project, run the following command in your terminal:
npx react-native init FirstProjectYou can call your project whatever you want.
Wait, what is npx? Npx is an npm package runner (it’s just a tool) that ships with Node.js. It’s a replacement for installing global packages. With npx, you can install packages locally, but still, run them as if they were global. Sweet!
When React Native is done, you’ll have your first project set up. Your terminal will output some instructions on how to start your newly created project:
                  Welcome to React Native!
                 Learn once, write anywhere

✔ Downloading template
✔ Copying template
✔ Processing template
✔ Installing CocoaPods dependencies (this may take a few minutes)

  Run instructions for iOS:
    • cd /Users/david/FirstProject && npx react-native run-ios
    - or -
    • Open FirstProject/ios/FirstProject.xcworkspace in Xcode or run "xed -b ios"
    • Hit the Run button

  Run instructions for Android:
    • Have an Android emulator running (quickest way to get started), or a device connected.
    • cd /Users/david/FirstProject && npx react-native run-android
Running your React Native app on Android
To run your React Native project via the Android emulator, run the following commands in your terminal:
cd FirstProject
npx react-native run-android
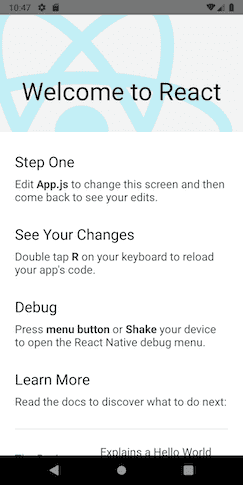
It may take a minute or so because your app launches the first time, depending on how powerful your machine is. If everything works, you should see the emulator popping up with this screen:
-
If you want to set up React Native on iOS too, here’s a guide for that: