If your current website is set up on Netlify, and you have just built a new website that you want to replace the old with — but keep using the same domain name — then there’s no reason to waste time creating a “new site from git” on your Netlify account. Instead, you can just edit your existing Netlify site’s settings and link it to the git repository that contains your new site.
Here’s how to link your current website to a new git repository on Netlify:
- Login to your Netlify account
- Click on the domain for the site you want to change git repository on.
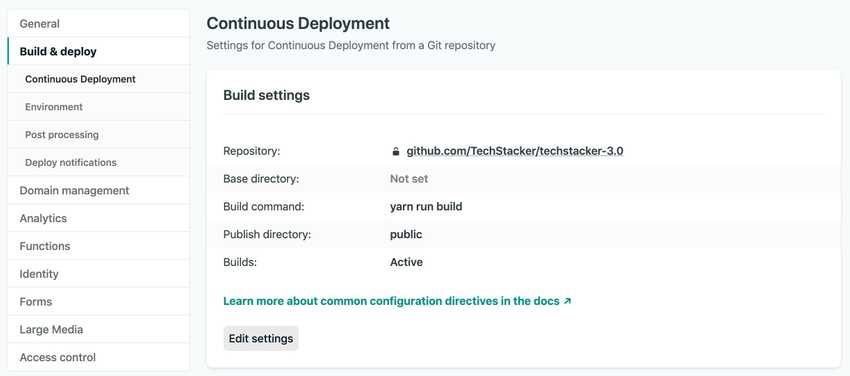
- Click on Site settings > Build & Deploy
You should be here:

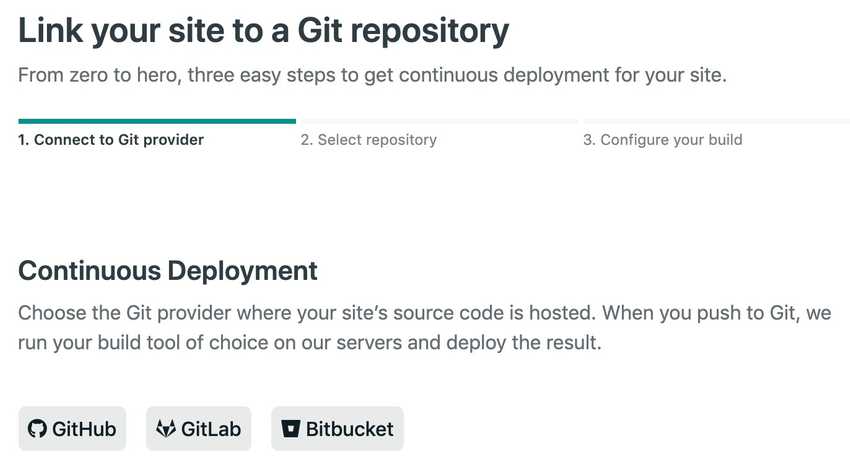
Now click on Edit settings and then click on Link to a different repository which will take you to this screen:

Click on your git provider (GitHub, GitLab, or Bitbucket) to prompt a screen with an overview of all your repositories.
Now click on the repository you want to switch to. This will take you to the final screen where you have to configure your build settings.
Here’s me doing all the steps above:
Once you're done you can hit the Deploy button, and your domain should now show the site from your new repository.
Troubleshooting
If the site change doesn't take effect immediately, even though Netlify says the new site is published, try clearing your browser cache and reload the page.
If that doesn’t work, go to Chrome DevTools (Mac: Cmd + Alt + i /Windows: Ctrl + Alt + i ) and hit the Application tab and click on the Clear site data button and reload your browser tab. This works 99% of the time for me.
If clearing site data gives you blank page, then don’t freak out. Just wait 5 minutes and then try accessing your domain again (and try reloading your browser tab a couple of times) and chances are it will show up now.